
How to Remove Sand from Your Car Easily and Effectively

Sand seems harmless until it gets into carpet fibers, seat tracks, floor mat grooves, cup holders, and every seam in the trunk. Around places like the North Shore, Schofield, Wheeler, and Hickam, it can follow you home after a beach day, a surf session, or a dusty parking area. The trick is to remove it in the right order. If you wipe too soon or vacuum too fast, you can grind grit into surfaces and make the job harder.
Here is a practical, detailer-style process for getting sand out without damaging your interior.

Start by removing the loose items
Before touching a vacuum, clear the cabin. Take out beach towels, slippers, kids’ toys, bags, trash, seat covers, and removable organizers. Sand hides under anything that shifts around while driving.
Pull out the floor mats and cargo liner if you have one. Shake them outside, away from the vehicle, not near the open doors. For rubber mats, tap the back side and flex the edges. For carpet mats, hold them upright and beat the back gently with your hand or a soft brush.
This first step matters because it prevents loose sand from falling back into areas you already cleaned.
Let dry sand work in your favor
Wet sand is heavy, sticky, and harder to extract. If the interior is damp from swim gear or beach traffic, give it time to dry. Open the doors in a shaded, breezy spot if possible. Avoid leaving the vehicle open in direct sun for too long, especially with leather or vinyl surfaces.
Once the sand dries, it separates more easily from carpet and upholstery. That simple change can cut your cleaning time noticeably.
Dry sand lifts. Wet sand smears.
Use the right tools before you vacuum
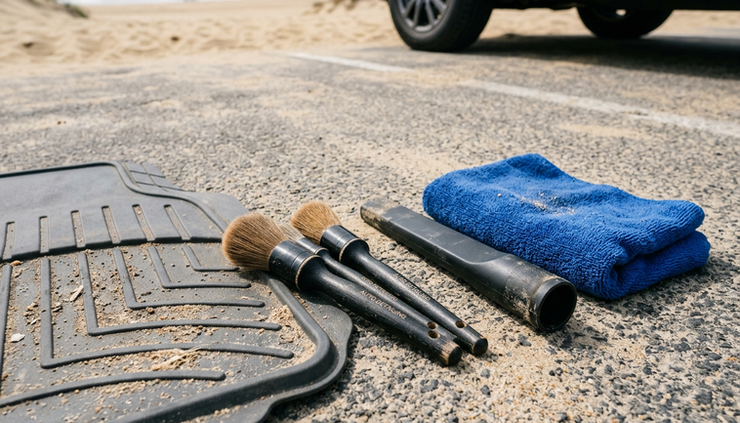
A standard household vacuum can help, but car interiors need smaller attachments and controlled movement. For the best Sand Removal results, gather a few basic tools before starting.
Useful tools include:
A vacuum with a crevice tool
A soft interior detailing brush
A stiff nylon brush for carpets and mats
A microfiber towel
Compressed air or a small blower
A pet hair or upholstery brush
Interior-safe cleaner for hard surfaces
Skip harsh scrub pads on plastic trim. Sand already acts like an abrasive, so aggressive scrubbing can leave fine scratches.
Vacuum in stages instead of rushing
Start with the seats, then move down to the carpets. Gravity helps. If you clean the floors first, sand from the seats can fall and undo your work.
Clean the seats first
For cloth seats, use a soft brush to loosen sand from seams, stitching, and the lower seat edges. Vacuum slowly. Move the nozzle in overlapping passes rather than quick back-and-forth motions.
For leather or vinyl seats, use a soft brush or microfiber towel first. Do not drag sand across the surface. Lift it gently, then vacuum the seams with a crevice tool. Pay attention to the gap between the seatback and the seat bottom.
Clean the carpet with agitation
Carpet traps sand deep in the fibers. Vacuuming alone often removes only the top layer. Brush the carpet in one direction to lift the fibers, then vacuum. Brush from a different angle and vacuum again.
This is where detailers use patience. Repeated light passes work better than one aggressive pass.
Think of the process as Sand abstraction, removing grit layer by layer instead of trying to force everything out at once.
Blow sand out of hidden areas carefully
Sand collects in seat rails, door pockets, cup holders, air vent edges, and the seams around the center console. A small blower or compressed air can push it out where the vacuum can reach it.
Work from the top down and from the inside outward. Keep the vacuum nozzle nearby while blowing so the sand does not scatter across the cabin.
Good areas to target include:
Seat tracks and mounting points
Pedal area and footwell corners
Door sill trim
Cup holder edges
Cargo area seams
Child seat anchor points
Use short bursts of air. Long blasts can send sand deeper into the dashboard gaps.

Treat floor mats based on the material
Floor mats take the worst of the mess, so clean them outside the vehicle.
Rubber mats need rinsing and brushing
Shake them first, then rinse with water. Use a mild car-safe cleaner and a brush to scrub the grooves. Rinse well and let them dry fully before putting them back. Wet mats can trap odors and make new sand stick faster.
Avoid greasy shine products on rubber mats. They can make the surface slippery.
Carpet mats need dry cleaning first
Vacuum both sides before using any moisture. Brush the fibers, vacuum again, then spot clean stains if needed. If the mats are soaked with saltwater or mud, use as little cleaner as needed and allow a full dry before reinstalling.
Wipe hard surfaces after the sand is gone
Dashboards, door panels, consoles, and plastic trim should be cleaned after vacuuming. If you wipe them while sand is still sitting on top, you may create small scratches.
Use a slightly damp microfiber towel or an interior-safe cleaner. Fold the towel often so you are not dragging grit from one area to another.
For cup holders, remove inserts if your car has them. Clean the inserts outside the car, then wipe the holder from the edges inward. A soft brush helps around buttons, knobs, and shifter trim.
Check the trunk and cargo area
The cargo area often gets missed, especially after beach chairs, coolers, dive gear, or sandy boots ride in the back. Remove anything stored there. Lift the cargo mat and vacuum underneath.
If the vehicle has a spare tire well, check it too. Sand can collect around the edges and stay there for months. In humid island conditions, trapped moisture and sand can lead to musty smells, especially if wet gear sits in the vehicle.

Prevent sand from coming back so quickly
A perfectly sand-free car may not last long near beaches, fields, and base parking areas, but a few habits help.
Keep a small brush by the door or in the trunk. Brush feet, slippers, and gear before loading up. Use all-weather mats if beach trips are common. Put towels, fins, and wet clothes in a washable bin instead of directly on the seat or cargo carpet.
After a sandy outing, do a quick shakeout the same day. Waiting lets sand move deeper into the fibers and seat tracks.
Know when to call a detailer
If sand keeps appearing after repeated vacuuming, it may be packed under seats, inside carpet backing, or around trim panels. Professional auto detailers have stronger extractors, compressed air tools, and techniques for removing trapped grit without damaging the interior.
A good result looks and feels clean. Carpets should not crunch under your hand. Seat tracks should move smoothly. Cup holders, seams, and cargo corners should be clear. With the right order, dry first, loosen, vacuum, blow out, and wipe last, sand removal becomes manageable instead of frustrating.



Comments