
How to Remove Iron Contamination from Your Car Safely

Tiny rust-colored specks on paint or wheels can make a clean car look neglected. They often come from brake dust, rail dust, road grime, and airborne metal particles that bond to the surface. Regular soap will not fully remove them, and scrubbing too hard can scratch the finish.
The safe fix is a careful chemical decontamination process using an iron remover, followed by a gentle rinse and protection. Done correctly, it can make paint feel smoother, brighten wheels, and prepare the car for wax, sealant, or ceramic coating.
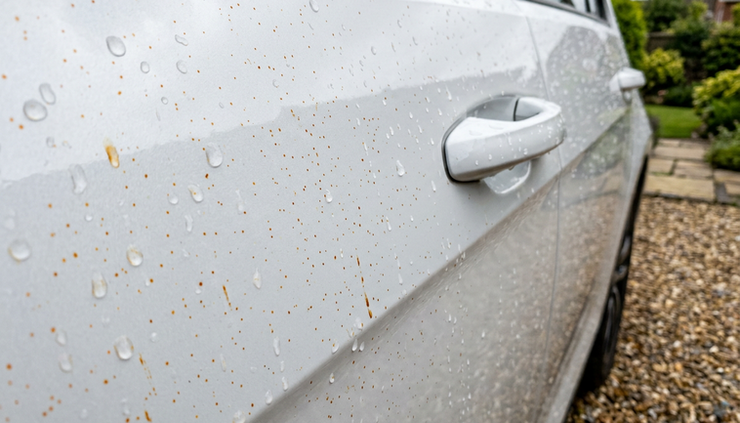
Know what iron contamination looks and feels like
Iron contamination usually shows up as tiny orange, brown, or rusty dots. It is easiest to see on white, silver, and other light-colored vehicles, but it can affect any paint color.
Common sources include:
Brake dust from your own vehicle and traffic around you
Rail dust from transport by train or ship
Industrial fallout from nearby work areas
Road grime that contains metal particles
Red dirt and salt air exposure in places like Oahu
On wheels, iron buildup often looks like dark brown dust baked into the barrel, spokes, and lug nut areas. On paint, it may look like rust, but the particle is usually sitting on or partly embedded in the clear coat.
A quick touch test can help. After washing, put your hand inside a clean plastic sandwich bag and lightly glide it over the paint. If the surface feels gritty, the car likely needs decontamination.
Gather the right supplies before you start
Use products made for automotive paint and wheels. Avoid harsh household cleaners, abrasive pads, and unknown acid-based wheel cleaners.
You will need:
pH-balanced car shampoo
Two buckets or a safe rinseless wash setup
Microfiber wash mitt
Dedicated wheel brushes
Iron remover labeled safe for paint and wheels
Nitrile gloves
Eye protection
Plenty of water
Clean microfiber drying towels
Wax, sealant, or spray protection
Work in shade on a cool surface. This matters even more in sunny areas like Honolulu, the North Shore, Schofield, and Wheeler, where panels can heat up fast. Iron remover should never dry on the paint.
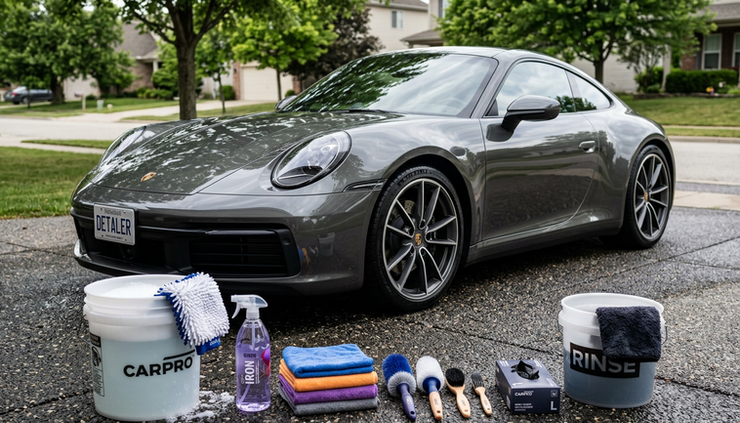
Wash the car first to remove loose dirt
Start with a full wash. Iron remover works best when it can contact bonded metal particles directly, not mud, sand, or road film.
Rinse the car thoroughly from top to bottom. Wash gently with a microfiber mitt and pH-balanced shampoo. Save lower panels and wheels for last because they collect the most grime.
For wheels, use a separate mitt or brush. Brake dust can be sharp and dirty, so do not use the same tools on paint afterward.
After washing, rinse well but do not dry the vehicle completely if you plan to apply iron remover right away. A slightly damp surface is usually fine unless the product label says otherwise.
Apply iron remover carefully and let it react
Spray the iron remover evenly over the affected area. You can treat the whole vehicle or focus on problem zones such as:
Wheels
Rocker panels
Rear bumper
Lower doors
Trunk or hatch area
Horizontal panels like the hood and roof
Let the product dwell for the time listed on the bottle. Many iron removers turn purple or red as they react with iron particles. That color change is normal. It does not mean your paint is bleeding.
Do not let the product dry. If the surface starts drying too quickly, lightly mist more product or rinse the panel. Work one section at a time if the weather is warm.
For wheels, use a soft wheel brush to agitate around lug nuts, spokes, and tight areas. For paint, avoid aggressive scrubbing. If needed, use a clean microfiber towel with very light pressure.
This is the key Iron Removal step, so patience matters more than force.
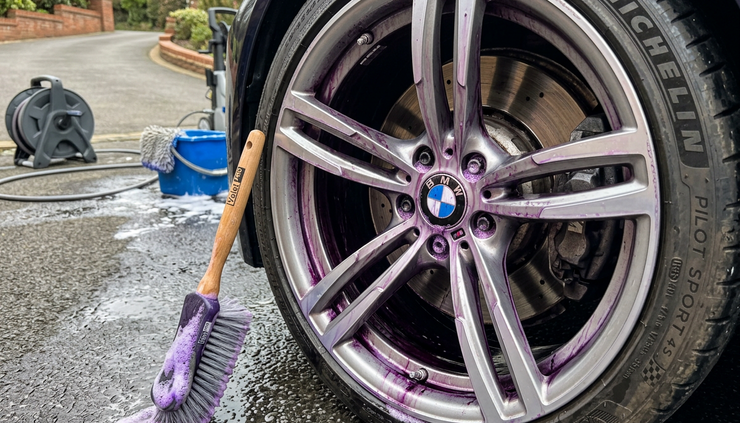
Rinse thoroughly from top to bottom
Once the product has finished reacting, rinse very well. Use steady water flow and pay attention to seams, trim, badges, lug nuts, and mirror housings.
Iron remover has a strong smell and can linger in crevices if rushed. Take your time. On wheels, rinse the barrels and brake caliper areas as much as possible without forcing water where it should not go.
If contamination remains, a second light application is safer than heavy scrubbing. Severe buildup may need a clay bar or synthetic clay mitt after the chemical step. Clay can remove stubborn bonded particles, but it can also mar soft paint if used carelessly.
If you use clay:
Lubricate the surface heavily.
Glide with light pressure.
Check the clay often for dirt.
Fold or replace it as it becomes contaminated.
Polish afterward if the paint looks hazy.
Protect the surface after decontamination
Iron remover strips away grime, but it can also weaken old wax or sealant. After rinsing and drying, add protection.
A spray sealant is quick and easy. Traditional wax adds gloss but may not last as long in heat, rain, and salt air. Ceramic spray coatings can offer stronger durability when applied to clean paint.
This step matters because clean, bare paint collects contamination faster. Protection creates a slicker surface, making future washes easier.
For a basic Auto Detailing routine, decontaminate every few months or as needed. Daily drivers near heavy traffic, construction, red dirt, or coastal air may need it more often than garage-kept cars.

Avoid common mistakes that can damage the finish
Iron remover is safe when used correctly, but small mistakes can leave stains or streaks.
Avoid these problems:
Applying it in direct sun
Hot panels make the product dry too fast.
Letting it sit too long
More dwell time is not always better. Follow the label.
Using it on unknown bare metal
Some raw metals, damaged finishes, or aftermarket parts may react poorly.
Scrubbing paint with dirty towels
A contaminated towel can scratch clear coat.
Skipping protection afterward
Clean paint needs a barrier against future fallout.
Always test a small hidden area if the car has older paint, repainted panels, matte finishes, or delicate trim. When in doubt, use less product, shorter dwell time, and more water.
What a successful result looks like
After a safe iron decontamination, paint should look cleaner and feel smoother to the touch. Wheels should appear brighter, especially around spokes and barrels. The surface should not feel sticky, gritty, or rough after washing and drying.
If orange specks remain after two careful applications, they may be deeper rust spots, tar, tree sap, or paint damage rather than normal iron fallout. At that point, a professional detailer can inspect the finish and choose the safest next step.
The best approach is simple: wash first, use the right iron remover, keep the surface cool and wet, rinse thoroughly, then protect the paint. That keeps the vehicle cleaner, smoother, and safer to maintain over time.


Comments