
How to Remove Bugs from Your Car Quickly and Safely

A short highway drive can leave the front of your car looking like it drove through a swarm. Bug splatter is more than ugly. The proteins and acids in insects can bond to paint, plastic, chrome, and glass, especially when the car sits in the sun.
The good news is that most bug messes come off fast if you soften them first and avoid scrubbing like you are cleaning a grill. Here is a safe, paint-friendly way to remove bugs from your car without scratching the finish.

What you need before you start
Gather everything before you wet the car. Once the bug residue starts to soften, you want to work while it is loose.
You will need:
A hose or pressure washer on a gentle setting
Two buckets, one for wash solution and one for rinsing
pH-balanced car wash soap
A microfiber wash mitt
Several clean microfiber towels
Bug remover spray or all-purpose automotive cleaner labeled safe for paint
A soft bug sponge or microfiber bug towel
Glass cleaner for the windshield
Spray wax, quick detailer, or sealant for protection
Avoid dish soap unless you are intentionally stripping wax before a full detail. It can remove protection from the paint and leave trim looking dry over time.
1. Park in the shade and let the surface cool
Move the car out of direct sunlight. The hood, bumper, mirrors, and windshield should feel cool to the touch before you begin.
Hot panels make cleaners dry too fast. That can leave streaks, spots, or stubborn residue. Shade gives the cleaner time to soften bug remains instead of baking them harder onto the car.
If you just came off the highway, wait a few minutes. Open air flow cools glass and paint unevenly, so a short wait helps you clean more safely.
2. Rinse the front of the car first
Start with a gentle rinse. Focus on the windshield, grille, bumper, headlights, mirror caps, and the front edge of the hood.
The goal is to remove loose dirt and grit before anything touches the paint. Tiny road particles can scratch clear coat if they get trapped under a sponge or towel.
Use steady water pressure, not a narrow blasting stream. If you use a pressure washer, keep the nozzle back from trim, parking sensors, decals, and chipped paint.

3. Soak the bugs with a safe cleaner
Spray a bug remover onto the affected areas. Let it sit for the time listed on the label, usually long enough to soften the mess but not long enough to dry.
If you do not have bug remover, place a wet microfiber towel over the area for a few minutes. Warm water and car wash soap can soften fresh splatter surprisingly well.
For the windshield, you can use automotive glass cleaner after the first rinse. For paint and plastic, stick with products labeled safe for exterior automotive surfaces.
Do not use harsh household cleaners, abrasive pads, steel wool, or dry paper towels. They can scratch paint, haze plastic headlights, or damage trim.
4. Wipe gently in straight lines
Once the residue softens, wipe with a microfiber bug towel or a soft bug sponge made for automotive paint. Use light pressure and straight motions.
If a spot does not move, stop and soak it again. Scrubbing harder is what causes damage. Bug remains usually need more dwell time, not more force.
Work in small sections:
Front bumper
Grille
Headlights
Mirror caps
Hood edge
Windshield
Rinse your towel or sponge often in the rinse bucket. Then reload it with soapy water from the wash bucket. This keeps grit away from the paint.
5. Wash the area with car soap
After the bugs are gone, wash the front end with car wash soap. This removes leftover cleaner and any oily film from the bug remover.
Use the two-bucket method if possible. One bucket holds clean soapy water. The other is for rinsing the dirty mitt. It is a simple habit that helps reduce swirl marks.
Wash from cleaner areas to dirtier areas. For example, do the hood edge and headlights before the lower bumper and grille, which tend to collect the most road grime.
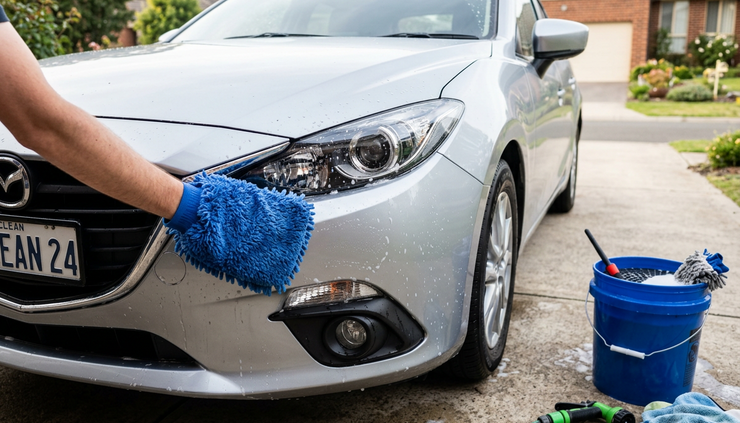
6. Rinse well and dry with microfiber towels
Rinse from top to bottom until the water runs clear and no cleaner remains in seams, grille openings, or around emblems.
Dry the area with clean microfiber towels. Pat or glide the towel over the surface instead of dragging it with heavy pressure. If you have a drying towel made for cars, this is the time to use it.
Check the windshield from inside the car after drying. Bug smears can look gone from the outside, then show up as streaks when light hits the glass.
7. Treat stubborn spots with clay only if needed
If the paint feels rough after washing, some residue may still be bonded to the surface. A detailing clay bar or synthetic clay mitt can remove bonded contaminants, but use it carefully.
Always use plenty of clay lubricant or soapy water. Glide the clay gently and stop if you feel it grabbing. Clay can mar soft paint if used dry or with too much pressure.
After claying, wash or wipe the area again. Then add protection, because clay can remove some wax or sealant.
8. Protect the cleaned surface
Once the front end is clean and dry, apply spray wax, spray sealant, or a quick detailer with protection. Follow the product directions and buff with a clean microfiber towel.
This step matters. A slick surface makes future bug splatter easier to remove. It also gives paint and plastic a light barrier against sun, road film, and insect residue.
If you drive often at night or on rural highways, keep a small kit in the car:
Microfiber towel
Travel-size quick detailer
Glass-safe bug cleaner
Small spray bottle of water
Use it only when the surface is cool and the dirt is light. For a very dirty car, wait until you can rinse it properly.

How often should you remove bugs from your car?
Fresh bug splatter is much easier to remove than dried residue. If you can, clean the front of the car within a day or two after a long drive. During warm weather, do it sooner, especially if the car sits outside.
For short trips, a quick rinse and wipe may be enough. After a long highway drive, give the front end a proper wash.
What success looks like
Your car should feel smooth to the touch, look clear under natural light, and have no smeared patches on the windshield or headlights. The paint should not look hazy, scratched, or dull from scrubbing.
The safest method is simple: cool the surface, rinse first, soften the bugs, wipe gently, wash, dry, and protect. Do that, and bug removal becomes a quick maintenance step instead of a paint-risking chore.



Comments